Posts

How to Fastboot Flash Moto X Play Factory Firmware Images

    Disclaimer: I am not responsible for anything that happens as a result of flashing these files. Your destiny is your own. Based on existing tutorial by @t-bon3. This guide has been created as a hard-brick occurred using the old Moto x Play tutorial. Please exercise extreme care with Fastboot, and only use the commands mentioned here. Experimenting with Fastboot commands can seriously damage your phone. How to Fastboot Flash Moto X Play Factory Firmware Images Required Files:     Motorola Drivers: Download     Latest Fastboot | ADB (Windows | Linux): Download (Windows 10 users may need this pack for Drivers to work.)       WARNING: You must perform a 'Factory data reset' in Stock Recovery before flashing any Firmware Image - instructions here. Factory data reset via Stock Recovery: (1) Flash via fastboot stock recovery.img (found in firmware image zip) (2) Turn your phone off. (3) Press and hold Volume DOWN + POWER. (4) In recovery menu press Volume

Marshmallow now include support for Multi-Window interface

Marshmallow now include support for Multi-Window interface but, it's disabled by default. You need a little bit of tinkering to get it to work. -First, you will need to have a rooted device, so make sure you flashed SuperSU 2.62 (older version won't work on Marshmallow). -Then, you will need to edit a single line inside build.prop (located in /system folder), I did this with Root Browser because many other file browsing apps have trouble getting root access with Marshmallow. Root Browser is working perfectly as long as you have the right version of SuperSU. -Once you open build.prop with Root Browser, you need to look for the line "ro.build.type=user", then you will need to change this line to "ro.build.type=userdebug", once it's done, reboot your phone . -Now, you need to enable Developer settings by going in Parameters/About phone and tap on "Build number" seven time. -You will now see the Developer settings in Parameters, open

How to install custom recovery and root Samsung Galaxy Grand 2 SM-G7102.

Image
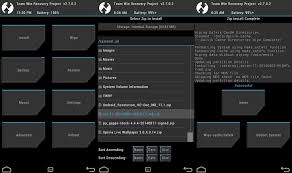
First of all flash with latest firmware.    Now boot you phone normally . Once done you need to have custom recovery.   With latest change log CHANGELOG for 2.8.6.0: http://forum.xda-developers.com/galaxy-grand-2/orig-development/recovery-twrp-2-8-6-0-touch-recovery-t3107535            For custom recovery follow below steps:-                 INSTALLATION PROCESS:                 1. CONNECT YOUR DEVICE TO A COMPUTER WHICH HAS ODIN                 2. OPEN ODIN ADD THE DOWNLOADED FILE IN AP(PDA) SECTION                 3. CLICK ON START (BEFORE THAT UNCHECK AUTOREBOOT)                 4. WHEN INSTALLATION COMPLETES AND ODIN WRITES RESET THEN DISSCONNECT YOUR            DEVICE                 AND TAKE OFF THE BATTERY                 5. BOOT TO RECOVERY USING THREE BUTTON METHOD (VOL UP+ HOME+ POWER)                 6. CLEAR CACHE AND REBOOT                 7. IT’S DONE!!!!!!! ·          Once the above process is done reboot you phone normally.    

[4.4.2][NH6] Deodex System : Update

Image
Guys I Had Deodexed & Zipalign The Android 4.4.2 H6 For Galaxy Grand 2 SM-G7102 I Have Tested On My Grand 2,Working Perfectly You Will Need Rooted Stock 4.4.2 H6 ROM & Custom Recovery On Your Grand 2 There's Only System App,Framework & Priv-App Included In The Zip (Bloats removed you can get it from Playstore easily free of charge ) Instructions To Install 1.Reboot Into Recovery 2.Flash Zip 3.Wipe Cache & Dalvik Cache 4.Enjoy Warning Make A Nandroid Backup Using CWM / TWRP Before Flashing! Download Link http://forum.xda-developers.com/galaxy-grand-2/themes-apps/4-4-2-deodex-update-t2896339